recent posts

Monday, October 31, 2011

Happy Halloween!


Here is some inspiration for your pumpkin carving if you have waited until the last minute:


http://www.sunset.com/


SpookyFX4U


These next few pumpkins were found at DigitalBusStop.com

Headless Horseman


Death Star
Deathstar

The Nightmare Before Christmas
Nighmare Before Christmas


made by Becca Williams


found here with more cool carvings


found at Cracked.com along with some more cool pumkins


Cute!


Scary!


Pretty!
Here are some sites to find template:

www.zombiepumpkins.com


Happy Carving,
Natosha


Thursday, October 27, 2011

I'm still here.

Hi!  My friend from California came to visit and in all the excitement I have not made anything, I hardly even cooked, so I am very sorry.  I am SO ready to get back into the swing of things and make something of this blog.

Last night I made chili and I have to say, I make some dang good chili.  Just ask me.  I will post the recipe soon.  It is not totally mine.  I re-worked a Southern Living recipe to suit Mike and myself.  That's the cool thing about chili, you can totally make it your own.

Halloween is approaching and I have not even figured out what my son will be going as.  He is almost 2 (b-day is on Thanksgiving!), any suggestions?  I was totally inspired by Cheri over at I Am Momma - Hear Me Roar and wanted Jax to be a Viking, but I haven't had the time to look for a viking helmet.  Leslie, my friend from Cali bought him a cute blue dress shirt that had a bow tie on it.  Maybe I will use that for something.  Not sure.  Panic setting in.  Well, I guess I have the weekend to figure it out.

Thanks for stopping by, hopefully I will be back on schedule next week with some fun new projects and recipes.

Natosha 

Tuesday, October 18, 2011

Try-It Tuesday

I haven't had a lot of spare time lately, so I don't have a project to post.  However, I do have a list of projects I hope to post soon.  They are:

1.  A cute and comfy pillow

2.  Girl's leopard headband and muff

3.  Baking sheet memo board

4.  Chalkboard placemats

5.  Pretty framed dry erase board

6.  Distressed hat/coat board

7.  Bird cage hanging light

Whew!  I better get busy.  What projects are you working on?

Thanks for stopping by!

Natosha

Monday, October 17, 2011


Manic Monday:  Things That Are Making Me Laugh  Today
These T-Shirts found on snorgtees.com :

If Zombies Chase Us

Dear Math, I'm Not A Therapist

The only thing we have to fear

Masked Turtles

On Etsy:


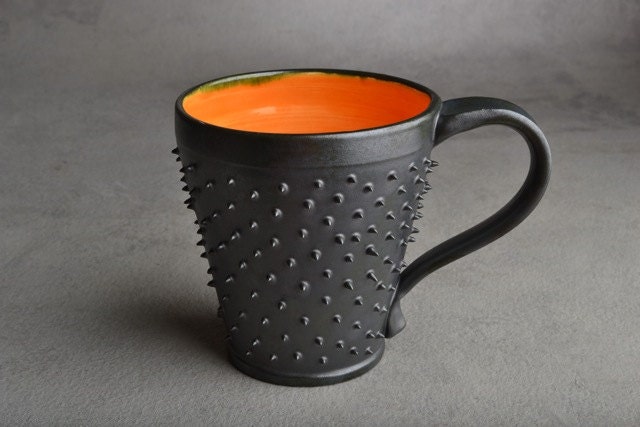
Made To Order Black and Orange Dangerously Spiky Mug by Symmetrical Pottery
made by Symmetrical Pottery found here


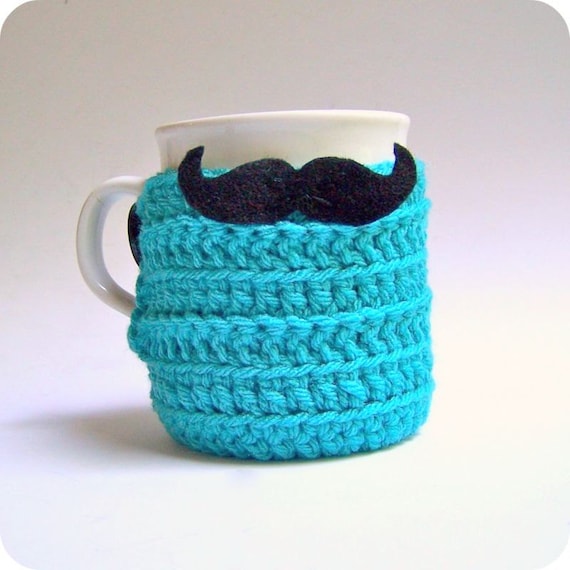
Coffee Mug Tea Cup Cozy funny Handlebar Mustache turquoise crochet handmade
made by Knot Workshop found here


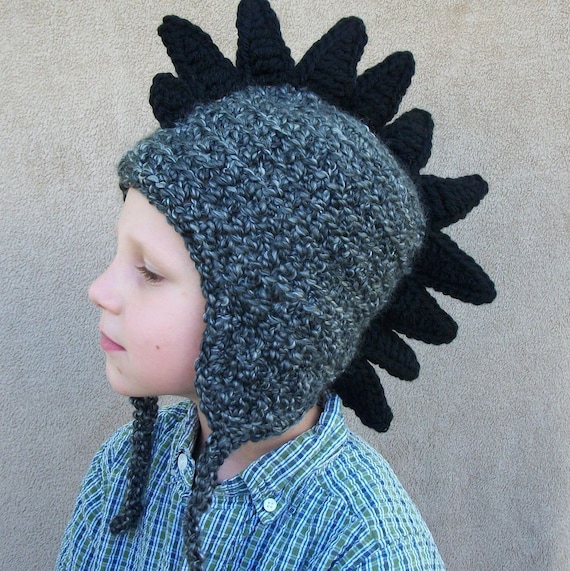
5 to Preteen Dragon Hat in Charcoal with Black Spikes
made by Pedestrian found here


On vat19.com :

The World's Largest Gummy Bear is 128 times heavier than a traditional gummy worm.


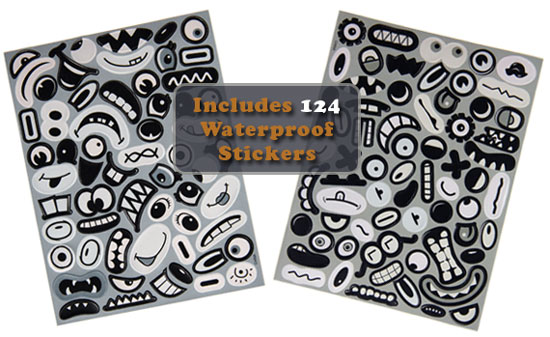
Inanimate Stickers SheetsInanimate Stickers


Building Block Soaps in a soap dish.


Hope you have a great Monday!  Thanks for coming by,

Natosha

Friday, October 14, 2011

Remember To Say I Love You

I know we read it everywhere, but is really is true.  We shouldn't put off telling those special people in our lives that we love and appreciate them.  We don't know what tomorrow holds and regret is an awful feeling.

One of the reasons we moved back to Arkansas was so I could spend time with my father and Jax could get to know his grandparents.  My dad has COPD (chronic obstructive pulmonary disease).  He's doing ok right now, but there is no cure and he will eventually die from it.  The truth is, any one of us could leave this earth at any time.

I'm not trying to be gloomy, just want to remind everyone how fleeting time is.  I strive to live each day to the fullest.  And believe me, I fall short a LOT.  Anyhow, I want to share some pictures of a few days we recently spent with PZ and Pop, my mom and dad.


Thanks for stopping by.  Have a great weekend!

Natosha

Thursday, October 6, 2011

Thrift-It Thursday: Crackle Finish Frame

Today I am going to show you how to create a crackle finish without buying an expensive kit.  I bought some wood picture frames at our local Habitat Restore for 50 cents and was originally going to spray paint them with a metallic paint.  But then I thought, why not find a thrifty way to crackle paint them.

Here is what I used:


wood picture frame
Elmer's Glue-All
acrylic paint, 2 colors
paint brush


First, you apply your base coat.  You generally want to apply a darker color as your base coat so that your lighter top coat has good contrast when it crackles.  Let it dry completely.


Next, working in sections, apply glue to frame.  Using your finger works best.  You want to work in small sections because you need to apply your top coat of paint while the glue is still tacky.


After applying the section of glue, using a brush, apply the top coat paint.  Use a light stroke going one way.  You don't want to use too heavy of a hand because you don't want the paint to mix too much with the glue.  After each short stroke, put more paint on the brush.

Let the paint dry completely and you should have a nice crackle finish. 


Here's the breakdown on what my frames cost to make:
     1.  frames - $1.00 (for 2)
     2.  glue -  $2.00
     3.  paint - $1.00 (for 2)
    
I got all my supplies at Hancock's Fabrics and K-Mart.  So my frames cost me $4.00, or $2.00 per frame.  Plus I have enough paint left over for another project and plenty of glue.

Last week, I posted the Elmer's Glue YouTube video where I got this idea.  Here it is again:


Thanks for stopping by,

Natosha

Wednesday, October 5, 2011

Whip-It Up Wednesday: One of my quick and easy stand-by dinners.

So, I was feeling pretty lazy about cooking (which has been my attitude a lot lately), so last night I made one of my super easy stand-by dinners that doesn't take any thought at all.  My freezer and pantry is getting low, but I usually always have the ingredients for this meal.

Tilapia, rice and a veggie!

Here are my ingredients:


For the tilapia, I melt a tablespoon of butter in a skillet and add a swish of olive oil.  I sprinkle the fish with lemon-pepper seasoning.  Right now my favorite is Weber Zesty Lemon Pepper, but you can use your favorite.  You can also change up this meal by using cajun spice, italian, etc.


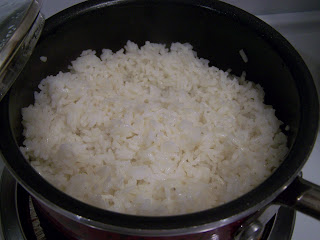
Rice:  I usually use the instant rice that cooks in 5 minutes.  I know, it's not cooking from scratch, but sometimes a girl just ain't got the time or the inclination.  Plus, the instant rice always (well almost always) comes out nice and fluffy and my son loves it.  I add a couple of tablespoons of butter to the water and a pinch of salt.  Here's where you can change thing up easily again, just by adding garlic or parsley, whatever suits you at the moment.  When I use the lemon-pepper seasoning, I always splash a little lemon juice on the fish before serving.


Last night's veggie was a stir-fry mix.  I used a little olive oil and voila!


There you go!  One of my all-time quick, and most importantly, yummy meals.


P.S.  I forgot to tell you, you can also substitute your favorite fish:  catfish, salmon, etc.

Thanks for coming by,
Natosha

Tuesday, October 4, 2011

Try-It Tuesday: Box Fold Felt Flower

Today's Try-It is a box fold felt flower.  I followed the tutorial at iCandy.  You can find it here.

I used the inexpensive (read - cheap) felt you can buy at craft stores sald by the sheet.  A more expensive felt would make a better looking flower, but I am pretty impressed with mine.  I hot-glued it onto a bobby pin.  It's a little hard to get in my hair.  The next one I will put on an alligator clip or a clamp.  Well, it is:


The tutorial was easy to follow and I didn't have any trouble making the flower.

Thanks for stopping by,

Natosha